📓 Git Merging
In the last lesson we explored creating and managing multiple branches in a single Git repository. As we learned, branches allow us to create multiple copies of our code. These copies may be used to experiment with implementing new code, without putting the "final version" or main branch at risk of bugs or errors.
Additionally, branches can be used to simply try out different options before deciding which should end up in the final iteration of the project; like we did in the previous lesson with different sets of CSS styles.
However, once we confirm the code located in a feature branch works, and that we want to include it in the final version of our project, we need to integrate this code into the main branch that represents our final product. The act of incorporating code from multiple branches together is called merging. In this lesson, we'll walk through merging branches together in our example project.
Project Recap
In the last lesson, we created a website to practice branching together. It currently has three branches:
mainblue_themered_theme
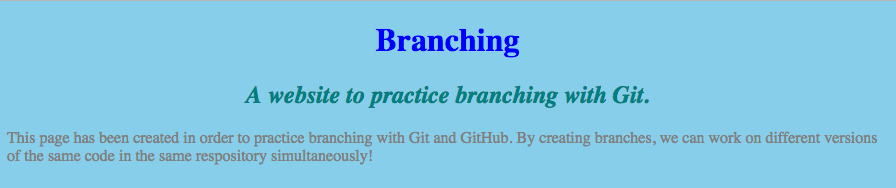
The main branch looks like this:

blue_theme was branched off of main. It contains one possible set of CSS rules for our site. They look like this:
red_theme was also branched from main. It contains an alternate set of CSS rules to style our site. They make our site look like this:

The commits across all branches should look something like this:

Now that we have two different options in place, we can decide which branch's styles we like best, and merge it into main.
Merging Branches
Let's say we've decided to use the CSS we wrote in the red_theme branch in the final version of our project. Since the main branch represents the final product, we'll need to merge the red_theme branch with main.
To merge two branches you must first navigate to the branch you'd like to introduce new code into. In our case, this is the main branch, because we'd like to integrate the CSS we created in red_theme into main.
Let's run $ git branch to see where we are currently located:
$ git branch

  blue_theme
  main
* red_theme
If you followed along with the previous lesson exactly, you should still be located in red_theme. Let's navigate into main using $ git checkout:
$ git checkout main

Switched to branch 'main'
Then, we'll run $ git branch again to confirm we've successfully navigated to main:
$ git branch

  blue_theme
* main
  red_theme
We can use the $ git merge command to bring the contents and commits of an outside branch into our current branch. In our case, we'll bring the commits from red_theme into the main branch we are currently located in. We'll run the following command:
$ git merge red_theme
This should result in something that looks like this:
Updating 982b0f2..d5bae64
Fast-forward
 css/styles.css | 17 ++++++++++++++++-
 1 file changed, 16 insertions(+), 1 deletion(-)
Now, let's run $ git log to view our commit history:
$ git log

commit d5bae6406669988e154608ce990e08fed51e9cb3
Author: Ada Lovelace and Enrique de la Fuente <enrique@>
Date:   Mon Oct 10 13:00:42 2016 -0700

    Make all font sans-serif style.

commit 5f2d9510cdc76736c7c5cf7e5d56264cd405fcd1
Author: Ada Lovelace and Enrique de la Fuente <enrique@>
Date:   Mon Oct 10 12:51:11 2016 -0700

    Add styles to h1, h2, p, and body to fit red theme.

commit 982b0f21463be34d909c45dd67778d6ffe3d7668
Author: Ada Lovelace and Enrique de la Fuente <enrique@>
Date:   Mon Oct 10 12:06:35 2016 -0700

    Add CSS rule to make H1 headings blue.

commit 8e36f8bfd58643487565c5a4fbcb5250fed0808b
Author: Ada Lovelace and Enrique de la Fuente <ada@>
Date:   Mon Oct 10 12:04:27 2016 -0700

    Create stylesheet, link in head of website.
Notice that the two most recent commits from red_theme are now part of the commit history here in main. This is because we merged red_theme into main. This means all code and commits from red_theme have been incorporated into main, too.
The commit structure of our project across all branches currently looks like this:

Notice that merging red_theme with main has brought all commits previously exclusive to red_theme here in main. Also, notice that the red_theme commits don't instantly disappear when we merge them into main. They still exist in the red_theme branch.
Deleting Branches
After successfully merging a branch (always confirm all of the branch's commits are present), you may delete it if you do not plan on using it further. This is safe to do because all commits in red_theme are now present in main. So, we don't risk losing any work.
We can delete a branch using the $ git branch -D command, like this:
$ git branch -D red_theme

Deleted branch red_theme (was d5bae64).
We can run $ git branch and see red_theme has been removed from the repository entirely:
$ git branch

  blue_theme
* main
And, since we opted to integrate the styles in red_theme instead of blue_theme, we no longer need the blue_theme branch either. We'll delete it at this time, too:
$ git branch -D blue_theme

Deleted branch blue_theme (was 268363a).
Know that merging doesn't always go quite this smoothly, unfortunately. If multiple branches contain edits to the same lines of code, Git won't know which edit should supersede which, and requires the developer to manually intervene (this primarily occurs when branches are working on the same code simultaneously, and both attempt to merge with main). This is known as a merge conflict.
However, we shouldn't encounter any merge conflicts quite yet. For now, simply make sure you're familiar with the general concepts of branching and merging. We'll explore merge conflicts, what they look like, and how to resolve them later on.
As you can see, merging and branching in Git is a powerful, complex feature. However, don't feel overwhelmed if you don't yet have a handle on everything we've covered in these past two lessons. Feel free to refer back to this content whenever necessary. Soon enough, branching and merging will become second nature!